Portfolio
Headshots Boudoir Personal Brand
More
Guides Investment Guided Posing About Book a Session
Home  /  Guides  /  How to Pose for Photos
Posing

How to pose for photos without guessing.

Almost nobody knows what to do with their body in front of a camera, and almost nobody should have to. Posing is a skill, not a personality trait. Here is the whole thing, from your feet to your eyebrows, in the order I teach it in my Naples studio, written so you can try it in a mirror tonight.

By Annie Watson · Naples, Florida · Updated September 2026
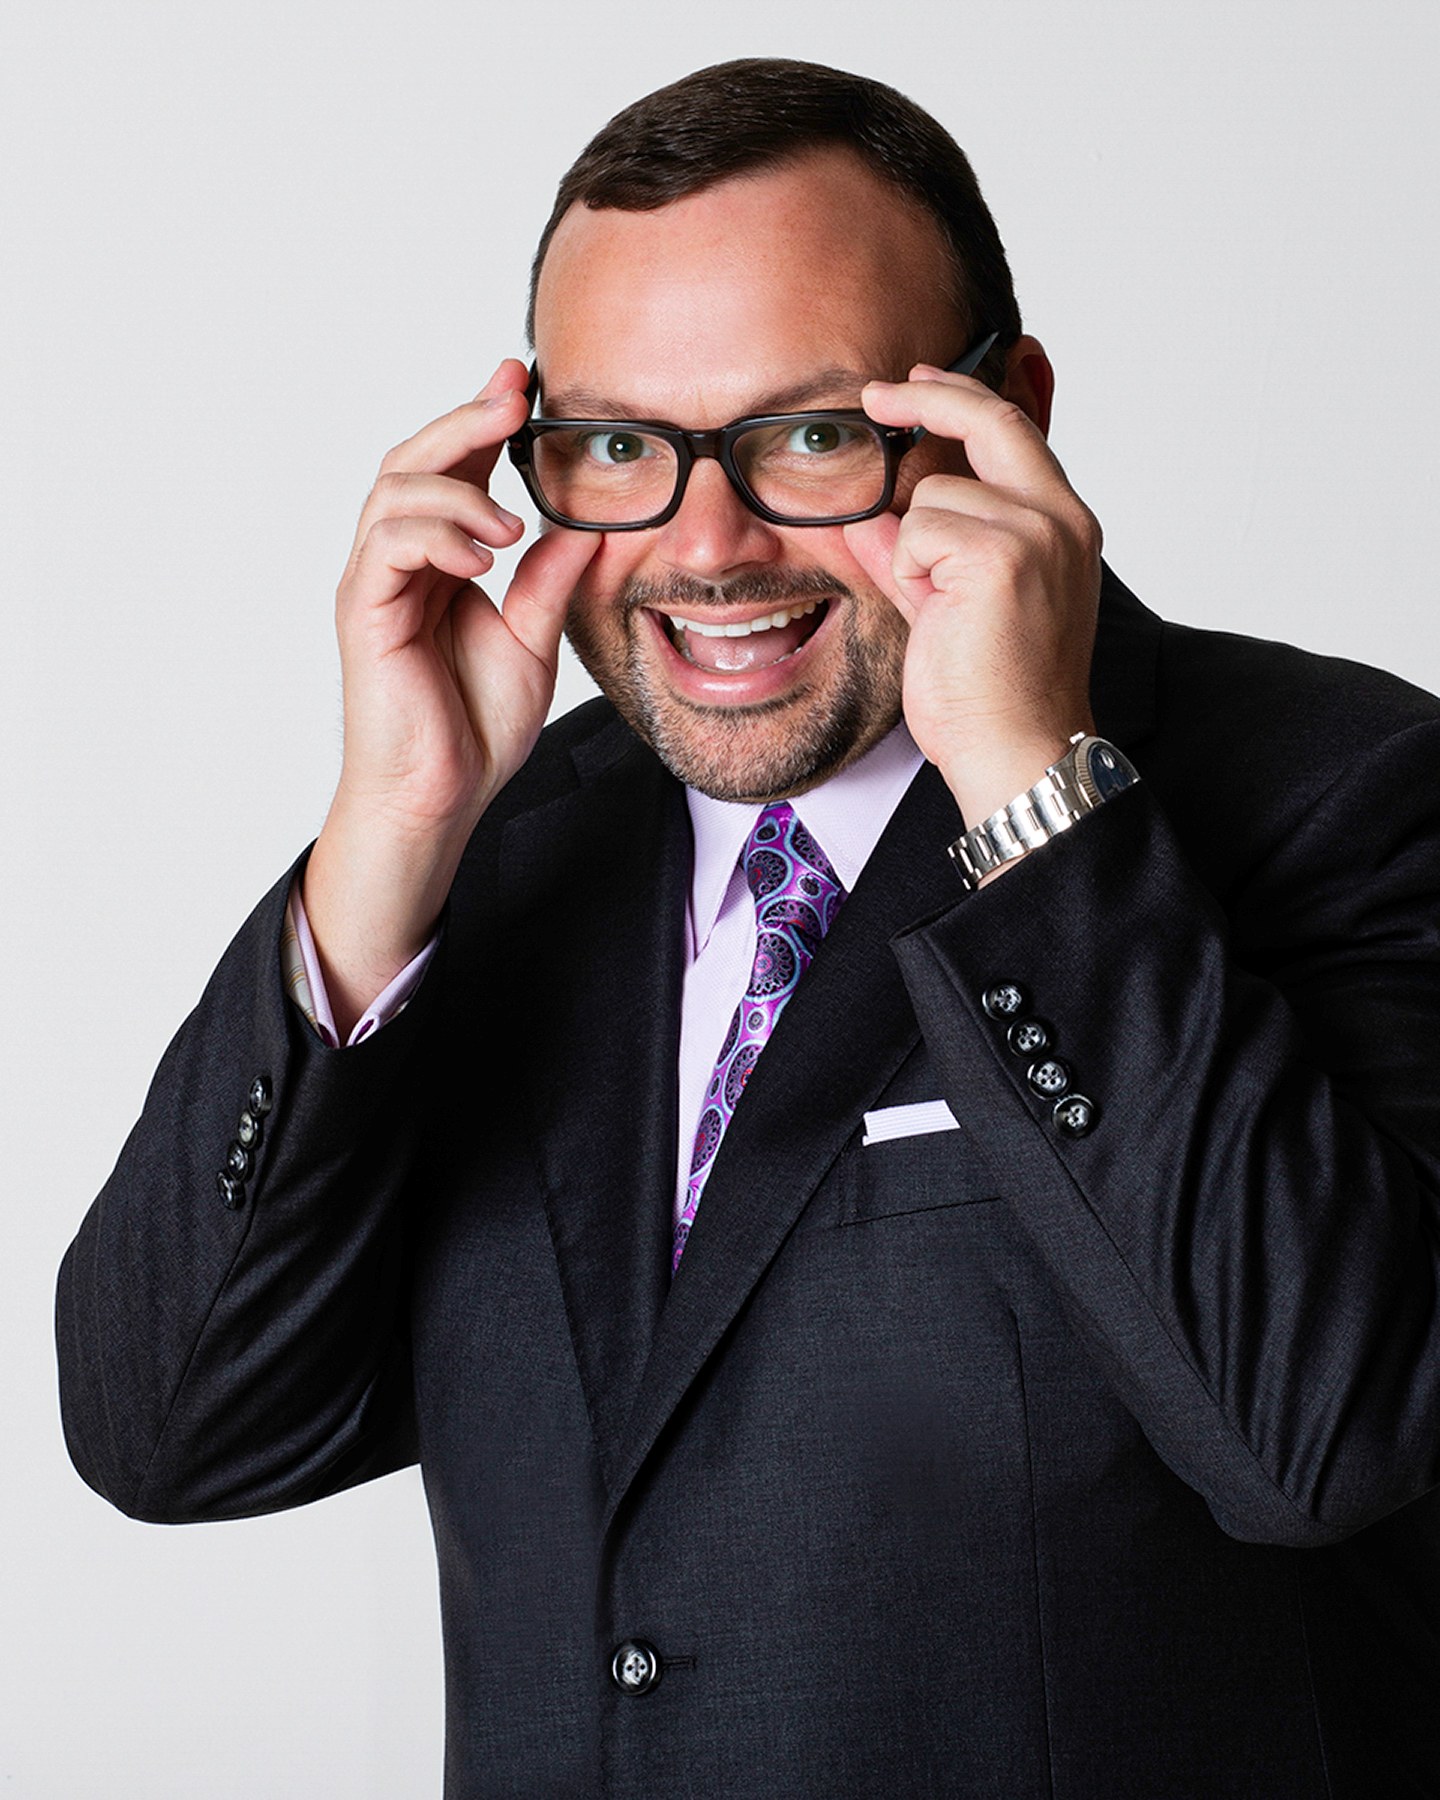
Man in a black suit and purple tie adjusting his glasses with a grin, white backdrop, photographed by Annie Watson in her Naples studio
The Short Answer

To pose for photos, turn your feet and hips about forty five degrees away from the camera, put most of your weight on the back foot, and bring your face back toward the lens. Drop your shoulders. Push your forehead slightly forward and bring your chin down a fraction, never up. Give your hands a job so they are not floating, and keep a gap of daylight between your arms and your ribs.

Then let the expression come last. Breathe out, soften your mouth, and let the warmth start in your eyes rather than your teeth. Every one of these adjustments is small. Together they are the whole difference between a photo you delete and a photo you use.

Everything begins with your feet.

Most bad photographs are lost below the knee, long before anyone thinks about the face. Standing square to the camera with your weight even on both feet makes you look wider, flatter and slightly braced, like a person waiting for a bus. The fix takes two seconds. Turn your feet and hips about forty five degrees away from the lens, stagger them so one foot sits a little ahead of the other, and shift most of your weight onto the back foot.

That single change does several things at once. Your hips read narrower to the lens. The front knee softens instead of locking. Your body reads as a line instead of a wall, and your clothes hang the way they were cut to hang. Try it in front of a mirror and rock your weight forward and back a few times. Nothing about your body has changed. Only the angle the camera sees has changed, and that is most of what posing is.

One more thing about feet: point the front one roughly where you want the viewer to look, usually toward the lens. Feet aimed in two different directions make the whole frame look accidental.

Shoulders down, spine long.

Now work upward. Roll your shoulders up toward your ears once, hold for a second, then let them fall. Wherever they land is where you want them. Nerves pull shoulders up and forward, and a camera reads raised shoulders as tension every single time, no matter how relaxed your face is. Lengthen through the top of your head as if you were being measured against a wall, but keep your ribs from flaring forward. Tall, not stiff.

Because your body is already turned, one shoulder is now closer to the camera than the other. Drop that near shoulder slightly. Uneven shoulders read as relaxed, level shoulders read as posed, and the difference costs you nothing. If you are wearing anything with structure, a jacket or a collared shirt, roll the shoulder back once so the seam sits where the tailor meant it to sit.

Then hold that line without holding your breath, which is the hard part and the reason the next sections exist.

The chin move everyone gets backwards.

Ask a person to fix their chin and they lift it. Lifting turns the soft underside of the jaw straight into the lens, which is the least flattering angle available on any face. The correct move is the opposite, and it feels wrong the first time you do it: push your forehead slightly toward the camera, then bring your chin down a fraction. Forward and down. Never up.

Done right, the skin under the jaw pulls taut, the jawline separates cleanly from the neck, and what reads as a double chin in a straight-on photo softens. That is the honest version of the claim you have seen everywhere about posing being flattering. It is not a promise about your face. It is geometry.

Practice it in a mirror in small increments, because the distance between correct and comic is roughly an inch. Push too far and you look like a bird craning at something. Not far enough and nothing has happened. Find your inch, learn what it feels like in your neck, and then stop thinking about it. Pair it with a small forward lean from the waist, because anything closer to the lens looks larger and more present, which is why leaning in reads as engaged rather than eager.

Give your hands a job.

Hands are where confidence goes to die. Left to themselves they clench, hide behind a back, or hang off the ends of your arms like they belong to someone else. The rule is not a position, it is a task. Hold the edge of a jacket. Slide one hand into a pocket with the thumb outside. Bring a hand to the opposite forearm. Hold a pen, a mug, the strap of a bag, the back of a chair.

  • Keep fingers soft and slightly separated. Flat, pressed-together hands read as tense; a little curve reads as calm.
  • Turn the narrow edge of the hand toward the camera. The back of a hand aimed at the lens looks far larger than it is.
  • Never let an arm press flat against your ribs. A visible gap between elbow and side keeps both the arm and the torso from spreading.
  • Watch your wrists. A hard right angle at the wrist looks like a mannequin. A soft break looks like a person.
  • If your hands truly will not settle, park them somewhere with a purpose, a hip or a pocket, and forget about them.

This is the single thing I direct most often, and it is the reason nobody in my studio ends up wondering what to do with their hands. On your own, choose two hand positions you trust and rotate between them rather than inventing something new in every frame.

Angles, and the side you like better.

Faces are not symmetrical, and almost everyone has a side they prefer without ever being told why. Find yours before you need it. In a mirror, turn slowly one way and then the other while keeping your eyes on your reflection. One direction will look more like the version of you that you carry around in your head. That is your side, and it is worth knowing.

Then learn the two angles that matter. Turning your body away while your face comes back toward the lens creates a slight three quarter view, which gives a face structure and depth. Squaring up to the camera with your face straight on is bolder and more confrontational, which is right for some portraits and wrong for most professional headshots.

Camera height matters as much as your own angle. A lens a little above eye level flatters nearly everyone. A lens below eye level flatters nearly no one, which is the entire reason the phone-held-in-your-lap photo never works. And keep your eyes on the lens even when your head is turned away from it. The moment your pupils slide into the corners of your eyes you look evasive. Turn the whole head, not just the eyes.

Sitting without collapsing.

Sitting is harder than standing, because a chair invites you to settle back into it and gravity handles the rest. Sit on the front third of the seat instead of against the back. Keep both feet planted, angle your knees away from the camera, and lean forward from the hips so the spine stays long rather than curving into the chair.

That forward lean is the whole trick. It carries your face toward the lens, keeps the torso from folding, and prevents the seated slump that makes anyone look shorter and heavier than they are. If there is a table, rest your forearms on it rather than driving your elbows down into it, and keep the same daylight between your arms and your body that you would keep standing.

Standing gives you height, full-length options and more variety of line. Sitting gives you a different energy: steadier, more considered, and easier for anyone who feels clumsy on their feet. Using both, and moving between them, is one of the fastest ways to make a group of images look like a real set instead of one frame shot over and over.
Expression is built, not summoned.

The word smile is the enemy. Told to smile, most people produce something with the mouth alone, and a mouth-only smile is instantly readable as manufactured. Real expression happens around the eyes: the muscles under the lower lids tighten slightly and the eyes narrow a fraction. You can practice exactly that. Look at your reflection, keep your mouth completely still, and tighten only the lower lids. That small squint is what warmth looks like in a photograph.

  • Breathe out just before the frame. Held breath shows up in the jaw and the shoulders first.
  • Break the face between frames. Look away, let everything drop, then come back. A reset face is far more convincing than a held one.
  • Think about one specific person or one specific piece of good news instead of trying to feel a general emotion on command.
  • Part your lips very slightly even when you are not smiling. A tightly sealed mouth reads as displeased.
  • For a serious portrait aim for interested, not empty. Blank is not the same thing as strong.

Expression is also where the purpose of the picture shows. A headshot wants credible and approachable at the same moment. A personal brand library wants range, from an open laugh to a quiet thinking frame you can put beside a long caption. A boudoir session wants something different again, and the complete boudoir guide covers how that direction changes.

The mistakes almost everyone makes alone.

None of these are flaws in you. They are simply what a body does when nobody is telling it anything, and they turn up in nearly every undirected photo.

  • Standing square with the feet together and the weight even, which flattens and widens at the same time.
  • Chin up, because lifting it feels confident. It is the one angle that never is.
  • Arms welded to the ribs, making both the arms and the torso look wider than they are.
  • Holding one smile across six frames until it sets into a grimace.
  • Looking down at a lens placed below eye level, which nobody looks good doing.
  • Locked elbows and locked knees, which read on camera as bracing for impact.
  • Forgetting the feet entirely, so the bottom of a full-length frame quietly undoes everything above it.
  • Checking a screen between frames and losing the shape you spent a minute building.

There is one more that is harder to see. Correcting nine things at once stops you being a person and turns you into a diagram: posture, chin, hands, weight, breath and expression all held simultaneously is far too much to run in your own head while also trying to look relaxed. Which is exactly what the last section is about.

Why a mirror only gets you halfway.

Everything above is true and all of it is learnable. What you cannot do from inside your own body is see the result. A mirror shows you a reversed, flat version of yourself at one fixed distance, lit by whatever is in your room, and it updates the instant you adjust. A camera sees something else entirely: a particular lens, a particular height, light shaped from one side, and a hundredth of a second you never get to preview.

That gap is the whole reason I direct. In a session you are not remembering nine rules. You are handed one small instruction at a time by someone who is watching the frame instead of the mirror, and what that method is, and why it works on people who dread the camera, is the subject of my page on guided posing.

Practice in the mirror anyway. It builds the muscle memory that makes direction land faster, the same way knowing the rules of a sport makes coaching useful. Then hand the watching to someone else. I photograph in a private studio where the light never moves, which lets me watch you instead of the sky.

Key Takeaways
  • Turn your body away from the camera, weight on the back foot, and let your face come back toward the lens.
  • Push your forehead forward and bring your chin down a fraction, because lifting the chin is the most common mistake there is.
  • Hands need a task, arms need daylight between the elbow and the ribs, and fingers should stay soft rather than flat.
  • Sit on the front of the chair and lean in from the hips, because a chair will fold you in half if you let it.
  • Expression lives in the eyes, so breathe out, reset your face between frames and think about something specific.
  • What you wear changes which poses work at all, so read what to wear before you plan your looks.
  • You can practice every one of these in a mirror, and you will still do all of them better with someone directing from behind the camera.
Next Step

Bring what you practiced, I will direct.

Mirror work is worth doing, and the version that ends up on your website happens when somebody else is watching the frame. My studio is in North Naples, and people drive in from Marco Island and across Southwest Florida for a sitting. Pricing is personal, so call (239) 319-6171 or send the form and tell me what you need.

Book a Session Call (239) 319-6171
Put It to Work

Sessions this guide points to.

Good to Know

Questions, answered.

How much mirror practice is worth doing?
A few minutes in a mirror helps, mostly so the instructions feel familiar rather than strange. What I would not do is rehearse a routine. Arriving with three poses you are determined to hit makes you rigid, and it fights the direction rather than using it. Learn the feel of the chin and the weight shift, then let me handle the order and the timing on the day.
What do I do with my hands when there is nothing to hold?
Give them a destination rather than a pose. A thumb hooked in a pocket, a hand resting on the opposite forearm, one hand holding the edge of a jacket. Keep the fingers soft and turn the narrow edge of the hand toward the camera. In the studio I place your hands for you, so you never have to decide.
Why do I look worse in photos than I do in the mirror?
Because the mirror is lying to you in a friendly way. It shows you reversed, moving, at a fixed distance, in your own light. A photograph shows you un-reversed and frozen, through a lens that compresses or stretches depending on how close it is. You are not less attractive than you thought. You are simply seeing an unfamiliar version, and posing and lighting exist to bridge that gap.
Do the same rules work for a full-length photo as for a headshot?
The head and shoulders rules stay the same. Full length adds the feet, the weight shift and the line of the whole body, which is why standing square ruins a full-length frame faster than a tight one. Full length matters most when the photo tells a story, for authors with a jacket photo to fill or contractors who need to look like they run the crew.
Can I bring poses I saved from somewhere?
Please do. Screenshots of pictures you like tell me more in ten seconds than a paragraph of description, and they usually tell me about the mood and the crop as much as the pose. We adapt them to your body, your clothes and the reason for the photos rather than copying them exactly, which is almost always better than the original idea.
Book Your Session

Your best headshot is one session away.

Tell me a little about what you have in mind and I will be in touch personally. Pricing is personal, so the best way to plan is a quick call.

Studio
5400 Yahl St, Naples FL

Prefer to talk? Call (239) 319-6171. I respond personally.