Portfolio
Headshots Boudoir Personal Brand
More
Guides Investment Guided Posing About Book a Session
Home  /  Guides  /  How to Pose for Boudoir Sessions
Posing

How posing works in a boudoir session.

If you are convinced that the posing is the part you will be bad at, that is the ordinary place to start from. It is not something you have to turn up knowing. Posing here is line, angle, hands, chin and where your eyes go, and every one of those is called out loud, one small instruction at a time, the whole way through.

By Annie Watson · Naples, Florida · Updated September 2026
Woman with long blonde hair in black lace, reclining and looking at the camera, dark backdrop, photographed by Annie Watson in her Naples studio
The Short Answer

Posing for boudoir is built from five things: the line of the body, the angle to the lens, what the hands are doing, where the chin sits and where you look. The body turns away from the camera and the face comes back toward it, the spine lengthens rather than bends, the hands stay soft and always have a destination, and the chin comes forward and slightly down rather than up.

You do not have to memorize any of it. In my studio each of those adjustments is directed out loud, and how covered you are is decided by you on the planning call, before anything is booked.

A pose is a line, not a position.

The first mistake is thinking of a pose as a shape you get into and then hold still inside. It is far more useful to picture one line running from the crown of your head down to whichever foot is carrying your weight, and then to think about where that line bends. A pose works when the line reads as continuous and deliberate. It stops working when it breaks in three places at once.

Boudoir asks more of that line than a headshot does, simply because more of it is in the picture. In a headshot the camera crops near the chest and the entire argument happens between your shoulders and your eyes. Here the frame is longer, so ankles matter, knees matter, and the gap between an elbow and a ribcage matters. The underlying mechanics are the same ones that govern any portrait, and if you want them set out on their own, how to pose for photos covers the standing, seated and hand work that everything below is built on.

The turn away, and the face coming back.

Nearly every frame starts the same way: your body angled off toward a corner of the room, your face returning toward the lens. Feet and hips point away, the weight settles onto the back leg, and then your shoulders and head rotate back a little less far than your hips went. That uneven unwinding, hips turned furthest, shoulders halfway, face almost square, is what makes a body read as a series of curves instead of a flat plane.

  • Square to the camera is the one angle that flatters almost nobody, and it is the one everybody defaults to when left alone.
  • The turn has to be uneven. If hips, shoulders and chin all aim the same way, the pose has gone flat no matter how good everything else is.
  • Weight belongs on the back leg. The front knee comes forward and stays soft, and it does most of the work of making the whole line look unforced.
  • Small is usually enough. Most of what I ask for is an inch or two, not a different position.

The arch lives in this same family, and it is much smaller than you would expect. What I actually ask for is length rather than curve: ribs lifting away from hips, the back of the neck growing taller, shoulders staying down while everything above them goes up. An arch built by throwing the shoulders back looks like effort, and effort photographs badly. One built by lengthening looks like nothing at all, which is exactly the point.

Hands are where nerves become visible.

Hands report on how you are feeling faster than a face does. Tense hands flatten out, fingers press together, knuckles go pale, and all of that shows at close range in a way it never would from across a room. It is also the most fixable thing in the session, which is why so much of the commentary is about fingers.

  • Every hand needs a destination. Hair, jaw, collarbone, hip, the opposite forearm, the back of the neck. Floating hands are the only kind that look wrong.
  • Soft, never flat. A slight curl through the fingers, a relaxed thumb, nothing splayed out and nothing gripping.
  • Let the camera see the side of the hand, not the flat of it. A hand shown back-on is wide and reads heavy.
  • Wrists are the tell. An over-bent wrist looks arranged. A long one with a gentle angle does not.
  • A hand touching your face or hair should barely make contact. Pressure changes the shape of whatever it presses on.

There is a second reason hands get so much attention. Being told precisely where your fingers go is steadying, because it is a small achievable task at a moment when the whole situation feels large. Somebody who has just been asked to relax has been handed an impossible job. Somebody who has just been asked to drop a ring finger has been handed an easy one, and doing an easy thing well is how the nerves start to go.

Forehead forward, chin down, every single time.

Of everything on this page, this is the adjustment that feels most wrong while you are doing it. Forehead gently toward the camera, then chin down a fraction. Not up. It is geometry rather than anything about your face, and it is the instruction that keeps coming back all the way through.

At boudoir distances it matters even more than usual, because the camera is often lower and nearer than you are used to being photographed from. A low camera plus a raised chin is the least forgiving combination in portraiture. Forward and down solves both at once: it lengthens the jawline and it puts your eyes into a better relationship with the light.

You will feel like a turtle. You will not look like one. That gap between what a pose feels like from the inside and what it photographs as is the whole reason somebody directing from behind the camera beats any amount of practice in a mirror.

Where you look sets the whole mood.

Direction of gaze changes an image more than anything you are wearing does, and it is the easiest thing to vary once a pose is already working. From one setup I will usually take several versions, changing nothing but the eyes.

  • Straight into the lens. Direct and self-possessed. It is the one that sounds hardest beforehand and very often the one that ends up working best.
  • Just past the camera, at a point I will name for you. Softer, and much easier if holding eye contact feels like a lot to ask.
  • Down and away, toward a shoulder or a hand. Quiet and private, and it shows the lashes and the line of a cheek.
  • Eyes closed, chin down, breathing out. This reads as calm rather than arranged, and it is the safest place to start if you are anxious.

None of these are moods you have to conjure up. Each one is a physical instruction with a named destination, which is why they still work when you have arrived certain you could not do this. Expression follows the eyes, so if a frame feels wrong the first thing I change is where you are looking.

Seated, leaning and low frames.

Standing is a small part of this. Most boudoir frames are built low or supported, and the mechanics shift as soon as something other than your legs carries the weight.

Seated, the rule is forward and hinged. Sit toward the front, tip from the hips toward the camera, and never let the spine settle back into a full rest, which folds a torso in half and pushes everything toward the lens at once. That principle governs every seated portrait I make, and my seated posing guide takes it apart properly.

Leaning is the friendliest option in the room for anybody who feels unsteady, because the support handles the balance and you are left with only the line to think about. There is a whole family of them and the angles are particular, which is why leaning poses gets its own page.

Reclining frames look the most effortless and are the most directed of the lot. The near arm has to stay off the ribs so daylight shows through, the top leg comes forward across the bottom one, the shoulders stack instead of collapsing, and the head rests without the neck vanishing into it. Nobody finds that arrangement by feel. I build it one instruction at a time, check it in the frame, adjust it twice, and only then start shooting properly.
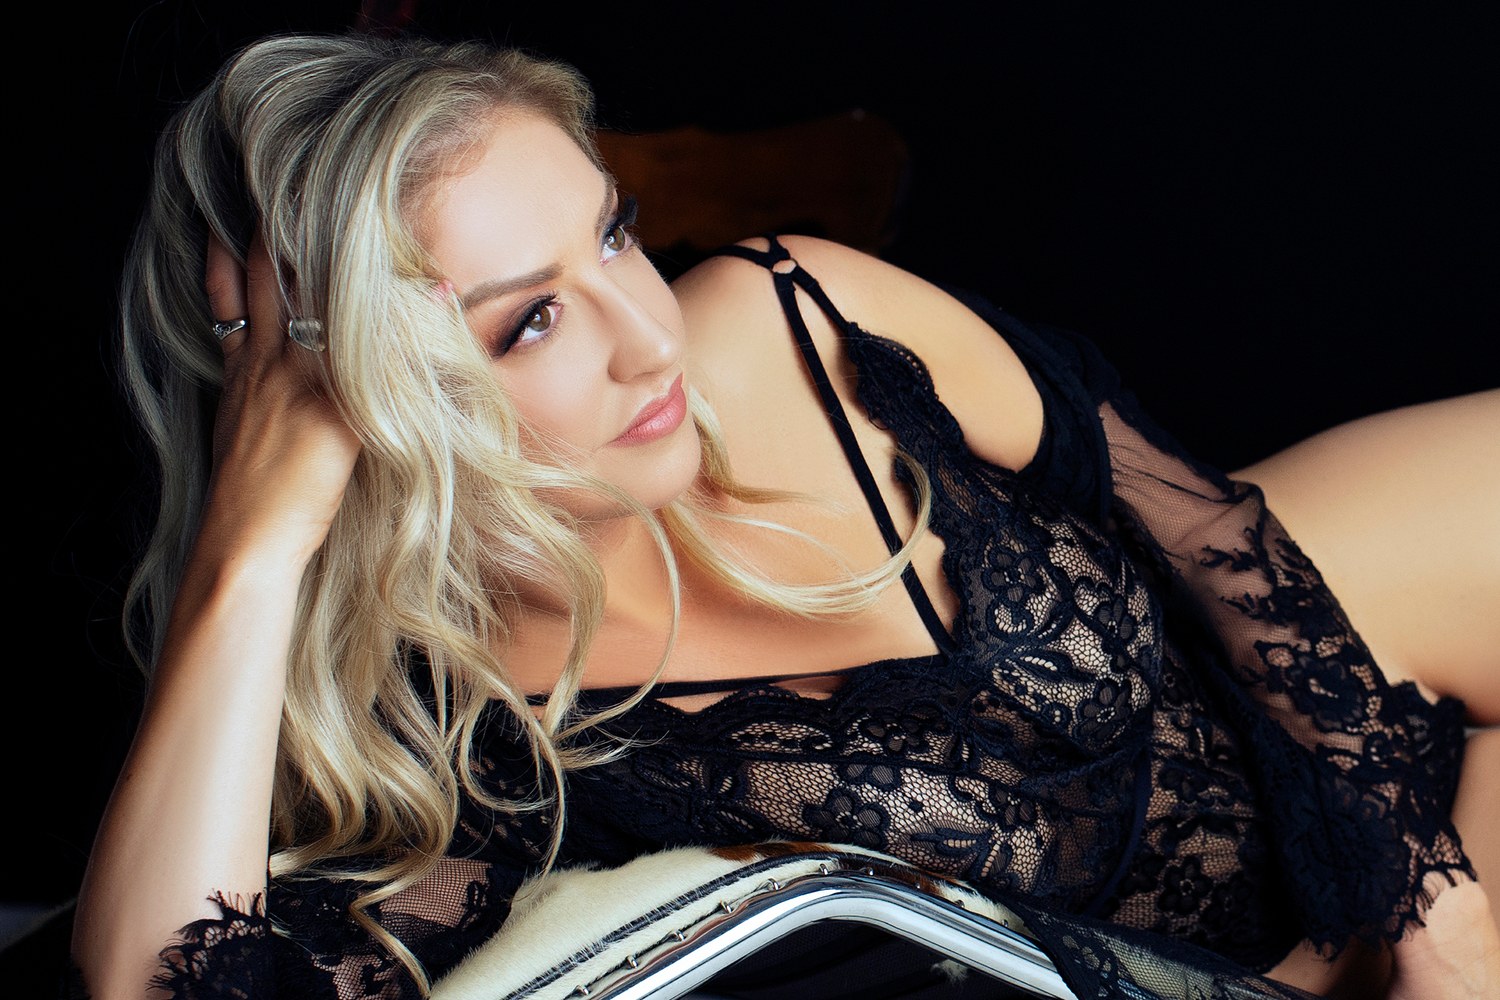
Every cue is said out loud.

There is no silent stretch where you are left to invent something. The direction is continuous and deliberately dull to listen to: a hand moved an inch, a wrist turned over, weight shifted back, breathe out, hold it there. It sounds technical because it is technical. What you are listening to is a running account of light and angles, which leaves no silence for you to fill in with your worst assumptions.

The part I want to be clearest about is the boundary. How covered you are is your decision, made on the planning call before anything is booked, and I will not ask you past the line you set. That line is not an opening position to be moved once the camera is out. A session can be completely covered and be no less a boudoir session for it.

That posture does not change with who is in front of the camera, at any size, any age or any history, which is the case every body makes at length. And if you would rather have the whole walkthrough than the posing alone, the complete boudoir guide runs from the planning call through to the private, password-protected gallery at the end.

Key Takeaways
  • Think of a pose as one continuous line from the crown of your head to your back foot, not a shape you get into and hold.
  • Turn the hips furthest, the shoulders back halfway and the face nearly square, so the body reads as curves rather than a flat plane.
  • Give every hand a destination, keep the fingers soft and show the narrow edge to the lens instead of the back.
  • Forehead forward and chin down a fraction, always, and most of all when the camera is low and close.
  • Change where you look before you change anything else, because gaze moves the mood faster than any other adjustment.
  • You set how covered you are on the planning call, and every cue in the room is spoken out loud so you are never guessing.
Next Step

Nothing here is homework.

You can read this twice and still not need it, because in the room I am telling you where the chin goes, what the hands are doing and where to look, one instruction at a time. If you want to talk through how covered you want to be before anything is booked, that is the first conversation to have. Call (239) 319-6171 or send the form.

Book a Session Call (239) 319-6171
Put It to Work

Sessions this guide points to.

Good to Know

Questions, answered.

Do I need to practice any of this before I come?
No. Practicing in a mirror teaches you what a pose feels like, which is worth something, but a mirror cannot show you what a lens does with it. Everything on this page gets directed out loud in the room anyway, in small pieces, with an adjustment after each one. If preparing settles you, read it out of curiosity. If it makes the whole thing feel heavier, skip it.
What happens if I freeze once we start?
It is expected, and the answer is smaller instructions rather than encouragement. If you lock up, I stop asking for a pose and start asking for one movement: turn your feet that way, drop the shoulder, breathe out through your mouth. Nothing to invent and nothing to perform. The tension usually goes early on, once it is obvious that all you have to do is follow along.
How do I know a pose is working when I cannot see myself?
You will hear it, because I say so. Part of directing out loud is saying when something has landed and why, so you are never left reading a silence. What feels most awkward from the inside is very often what reads best, which means your own sense of a pose is not a reliable instrument here. Borrow mine instead.
Will I be asked to do anything I already said I did not want to do?
No. How covered you are is decided by you on the planning call, before anything is booked, and I will not ask you past the line you set. That line is not a starting offer to be negotiated upward once the camera comes out. If you want to move it in the other direction on the day, that is yours to move as well, and none of the posing depends on it either way.
Does any of this change if I am not a confident person?
Not really, because none of it requires confidence. Every cue is a physical instruction with a destination: this hand here, weight there, look at that point, chin down a touch. Confidence in front of a camera is mostly a by-product of knowing what happens next, and being told what happens next is the entire method. Describing yourself as hopeless at this is not a disqualification. It is the assumption the whole approach is built on.
Should hair and makeup be done beforehand?
It changes nothing about the posing, which is the only reason it belongs on this page at all. I work with several professional stylists who can be arranged for hair and makeup before the shoot, for an added fee, and doing your own is an equally good answer. The decision itself, and how to brief somebody who has not photographed you before, belongs to professional makeup versus doing your own. Decide it early either way, because it changes how the day is planned.
Book Your Session

Your best headshot is one session away.

Tell me a little about what you have in mind and I will be in touch personally. Pricing is personal, so the best way to plan is a quick call.

Studio
5400 Yahl St, Naples FL

Prefer to talk? Call (239) 319-6171. I respond personally.