Portfolio
Headshots Boudoir Personal Brand
More
Guides Investment Guided Posing About Book a Session
Home  /  Guides  /  How to Pose for LinkedIn Headshots
Posing

Posing for the circle LinkedIn cuts.

LinkedIn does not show your photograph. It shows a circle cut from the middle of it, at roughly the size of a coin, usually stacked in a column of other people. That crop changes which poses are worth doing at all, and most posing advice was written for a picture nobody on that platform will ever see.

By Annie Watson · Naples, Florida · Updated September 2026
Young man with curly hair in a pink shirt and jeans, seated on a stool, white backdrop, photographed by Annie Watson in her Naples studio
The Short Answer

To pose for a LinkedIn headshot, turn your shoulders about thirty degrees off the lens, then bring your face back until it is close to square with the camera. Keep your head level rather than tilted. Push your forehead slightly forward and bring your chin down a fraction. Let the shoulder nearest the camera drop. Look straight at the lens and breathe out just before the frame.

Everything below your collarbone is outside the crop, so it earns nothing on its own. It still matters, because what your arms and hands are doing decides the shoulder line the circle does show. Pose the body for the shoulders. Pose the circle for the face.

The crop spends your whole posing budget.

Think of a pose as a budget. In a full-length frame you spend it across feet, weight, hips, hands, arms, spine and face, and every one of those pays something back. In a circle that stops just below your collarbone, six of those eight are outside the frame entirely. The budget collapses onto shoulders, neck, head and eyes, and it has to be spent there with far more care than a wide picture ever demands.

That is the single idea this page turns on. Poses that look wonderful elsewhere are invisible here: the hand on the hip, the crossed ankles, the lean against something. Worse, some of them damage what does survive, because a hand planted on a hip pulls that shoulder up and forward, and the circle shows the raised shoulder with no explanation of where it came from.

So work backwards. Decide what the top of your body should look like inside a tight square, then choose a full-body position that produces it. The broad mechanics of the whole body, feet upward, live in how to pose for photos, and the framing, background and refresh questions for this specific photo sit in my guide to the LinkedIn profile photo. This one stays on what your body is doing inside the circle.
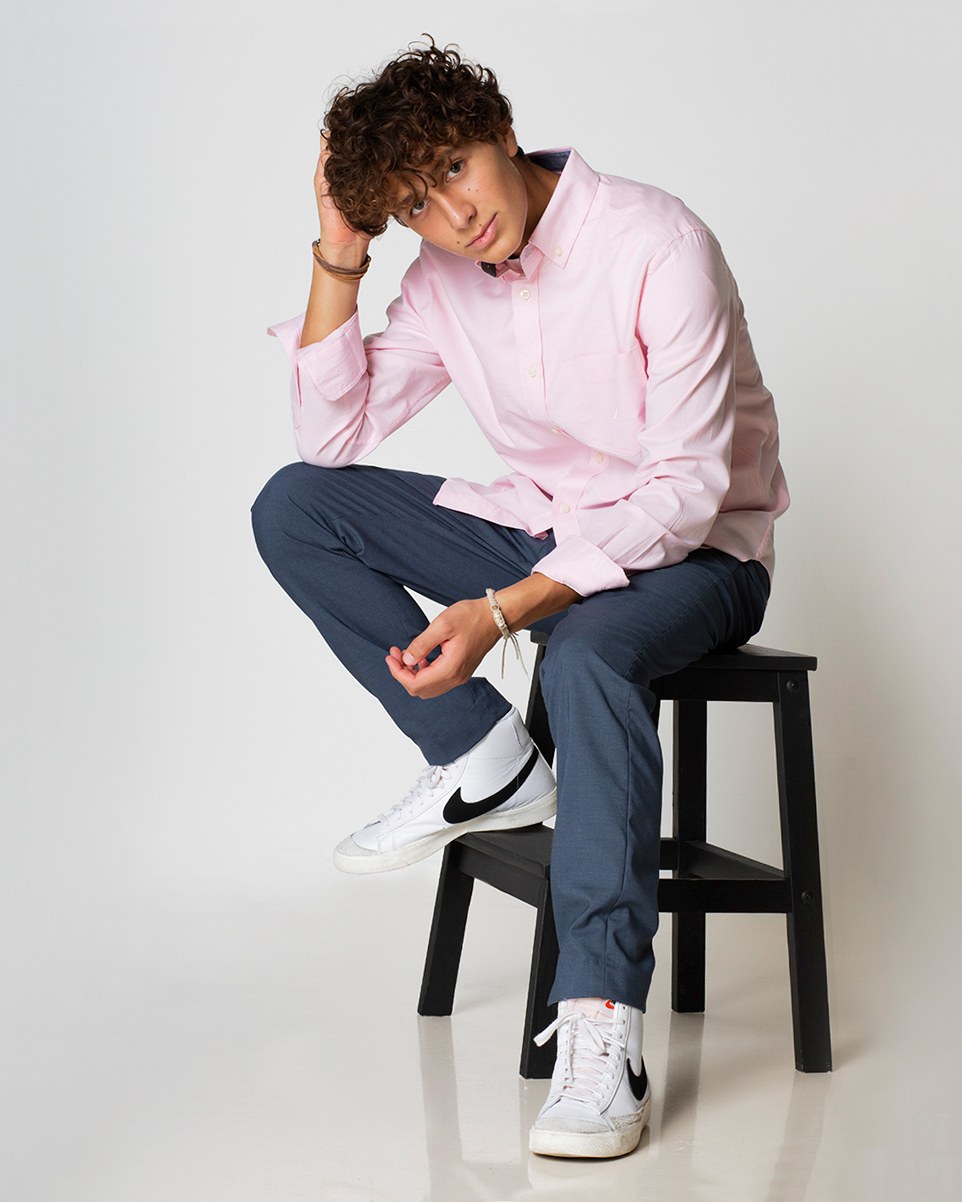
Shoulders off the lens, face nearly back.

The shape that works is a small contradiction: an angled body carrying a near-frontal face. Turn your shoulders roughly thirty degrees away from the camera, which is less than the classic forty five you would use standing full length. Then rotate your head back toward the lens until you are close to square, stopping a few degrees short so there is still a hint of a turn.

Two things are happening. The angled shoulders give the circle a diagonal, and a diagonal is the only line available in a frame with no legs and no background to speak of. The returned face keeps both of your eyes the same size and stops your nose crossing the line of your far cheek, which is what a strong three-quarter face does at close range and why it reads oddly small in a thumbnail.

Then drop the near shoulder. When your body is turned, one shoulder is closer to the camera and it wants to ride up. Let it fall, and let the far shoulder stay a little higher. Level shoulders read as a passport photo. A slight, quiet asymmetry reads as a person who was mid-conversation. If you are on the shorter side and worried about the frame swallowing you, the scale questions are handled in posing for petite frames, and almost none of them apply once the crop is this tight.

Chin forward, chin down, in miniature.

Every chin error is magnified by this crop, because there is nothing else in the frame to look at. A raised chin in a full-length photo is a small flaw somewhere near the top of a large picture. A raised chin in a circle is the picture.

The move is forward and down, in that order. Lead with the forehead, easing it toward something just behind the lens, then let the chin settle a fraction lower. It feels wrong from the inside and registers as nothing from the camera side. What it does is pull the skin under the jaw taut and separate the jawline from the neck, which at circle size is the whole difference between a defined edge and a soft one.

The margin here is genuinely small. Half an inch too far and you are peering. Half an inch short and nothing has changed. It also drifts back the moment you start thinking about your face instead of your neck, which is why it gets said out loud several times inside a single look.

One caution specific to the circle: do not combine the forward push with a lean. In a wider frame a lean toward the lens reads as engaged. At this crop it makes your head noticeably larger than your shoulders, and the picture reads slightly cartoonish without anyone being able to say why.

Keep your head level.

The head tilt is the most oversold pose in existence, and the circle is where it does the most damage. A tilt has to be read against something vertical to feel deliberate: a doorway, a horizon, the edge of a frame. A circle has no verticals at all. Tilt inside one and there is nothing to tilt against, so the head just looks like it is sliding off the side.

There is a second cost. A tilt drops one shoulder further and lifts the other, so the shoulder line and the head line disagree, and in a small image the eye reads that disagreement as uncertainty. For a photo whose entire job is to look like somebody worth replying to, that is a poor trade.

Keep the head level, and if you want any tilt at all, make it a degree or two toward the lower shoulder, which follows the shape your body is already making. The full case for and against it, including the frames where it belongs, is in the guide to the head tilt.

The same discipline applies to your eyes. Aim your whole head at the lens rather than looking out of the corner of your eye. A face turned one way with the pupils dragged the other reads as evasive, and doubly so at the size of a fingernail.

Your hands are in the photo anyway.

Hands are cropped out and still decide half of what you see. Whatever your arms are doing sets the height, width and tension of your shoulders, and the shoulders are the only part of your body the circle keeps.

  • Arms hanging dead at your sides pull the shoulders down and back, which flattens the diagonal you just built and widens the top of the frame.
  • Hands clasped in front, the wedding-guest position, rolls both shoulders forward and rounds the upper back into the crop.
  • Hands on hips raises both shoulders toward the ears and shortens the neck, which is the opposite of everything the chin work is doing.
  • Folded arms push the shoulders up and forward and add a wedge of forearm at the bottom edge of the circle, where it is unreadable.
  • A thumb hooked in a pocket, or one hand cupping the opposite forearm, low and out of frame, keeps the arm relaxed without disturbing the shoulder line at all.

The general placement rules, what fingers should do and which edge of the hand faces the camera, are worked through properly in what to do with your hands in photos. For this crop the requirement is narrower than that: pick something low, symmetrical enough not to twist you, and light enough that it does not tighten anything above the collarbone.

It is also the answer to whether to ask for full-length frames. Ask for them, because they are useful elsewhere, but never cut the profile crop out of one. Composed at full length, your face occupies a fraction of the frame, and a circle taken from that fraction has nothing left in it.

An expression that answers a message.

The test for this photo is simple. Somebody is about to send you a message, and they are looking at your face while they decide. Does it look like it will reply?

The build is the ordinary one, breath first, then the eyes, then the mouth if at all, and it is set out in full in how to pose for photos. What the circle changes is the tolerance around it. A sealed mouth that reads as merely neutral in a large frame reads as displeased at this size, and a smile that never reached the eyes has nothing around it to explain itself.

Let the face go between frames. An expression held through a run hardens into effort, and effort is exactly what a thumbnail exposes. The choice between an open smile and a composed, serious one depends on your field and what you want a stranger to feel, and I have made that argument at length in smiling versus serious headshots.

Whichever you choose, the eyes have to stay engaged. A serious expression with live eyes reads as considered. A serious expression with dead eyes reads as absent, and at circle size there is no context to rescue it.

Check it in the circle, not at full size.

Before you decide whether a pose worked, look at it in the circle the platform actually shows, on a phone, at arm's length.

  • Is your head level, or has a tilt crept in that you liked at full size?
  • Are your shoulders angled, and is the near one lower than the far one?
  • Can you see a line between your jaw and your neck?
  • Are both eyes the same size, and is the whole head pointed at the lens?
  • Does the mouth match the eyes, or is one of them working alone?

Any single failure on that list is fixable in a sitting, and most in one instruction. What cannot be fixed afterward is a photo built at the wrong distance, which is the honest argument for LinkedIn headshots made with the circle in mind from the first frame.

In my studio I frame for the crop and direct against this list continuously: shoulders, chin, level, eyes, breath, again. All of my headshots are made that way, so the small version is the one built first rather than the one left over.

Key Takeaways
  • The circle keeps your head, neck and shoulders and discards everything else, so spend the entire pose on those.
  • Turn your shoulders about thirty degrees off the lens and bring your face back toward it, stopping just short of fully square.
  • Push your forehead forward and lower your chin a fraction, and skip the forward lean that works in wider frames.
  • Keep your head level, because a circle gives a tilt nothing vertical to be read against.
  • Choose a hand position for what it does to your shoulders, not for how it looks, since your hands are outside the crop.
  • Build the expression from the eyes outward and reset your face between frames rather than holding one.
  • Judge any candidate photo at thumbnail size on a phone, because that is the only size anyone sees.
Next Step

One circle, built on purpose.

A profile photo cropped out of something else is always a compromise, and it shows at the size that counts. Come and have one made for the circle instead: shoulders angled, head level, chin handled, and a face that looks like it would answer. Planning and pricing are personal, so call me at (239) 319-6171 or send the form.

Book a Session Call (239) 319-6171
Put It to Work

Sessions this guide points to.

Good to Know

Questions, answered.

Should my body face the same direction as my face?
No, and that is the main thing that separates this crop from a snapshot. Angle your shoulders off the lens, then rotate your face back to it. Fully square shoulders make a small frame look flat and wide, and a fully turned face makes one eye smaller than the other at close range. The gap between the two directions is where the shape of the picture comes from.
Do I need a full-length photo taken at the same time?
It is worth having, and it should be its own frame rather than the source of your profile crop. A wider picture is useful for a banner, a speaker listing or a page that needs space beside you for words. Ask for it while the looks are being planned, because shooting loose on the day is easy and inventing room around a tight frame afterward is impossible.
What do I do with my arms if I am sitting for the photo?
Keep your weight forward rather than sinking backward, bring your forearms to rest somewhere low, and keep your elbows away from your ribs. The trap when seated is a spine that rounds, because it rolls both shoulders forward into the crop. Sitting is a perfectly good way to make this photograph, as long as your spine stays long and your face still travels toward the lens.
My shoulders always look uneven. Is that a problem?
Almost nobody is symmetrical, and the circle is honest about it. The fix is not to force both shoulders level, which looks braced, but to choose which one sits lower and make it deliberate. Turn so the naturally lower shoulder is the one nearest the camera, and the asymmetry stops reading as a flaw and starts reading as a relaxed angle. That is a decision I make from behind the camera, since it is not something you can see from where you are standing.
Can I use the same pose for my company bio and my profile?
You can, and you probably should, because being recognizable in both places is worth more than variety. What I would change is the crop rather than the pose. Bio pages often run wider and squarer than a profile circle, so ask for the same look framed two ways in the same sitting. Same clothes, same direction, same expression, two different amounts of room around you.
Book Your Session

Your best headshot is one session away.

Tell me a little about what you have in mind and I will be in touch personally. Pricing is personal, so the best way to plan is a quick call.

Studio
5400 Yahl St, Naples FL

Prefer to talk? Call (239) 319-6171. I respond personally.