Portfolio
Headshots Boudoir Personal Brand
More
Guides Investment Guided Posing About Book a Session
Home  /  Guides  /  How to Hide a Double Chin in Photos With Posing
Posing

How to soften a double chin with posing.

Almost every person who dislikes their photographs points at the same place, and almost every person is looking at a lens problem rather than a face problem. Here is what actually creates that look in a picture, what posing genuinely does about it, in what order, and where the honest limit of it sits.

By Annie Watson · Naples, Florida · Updated September 2026
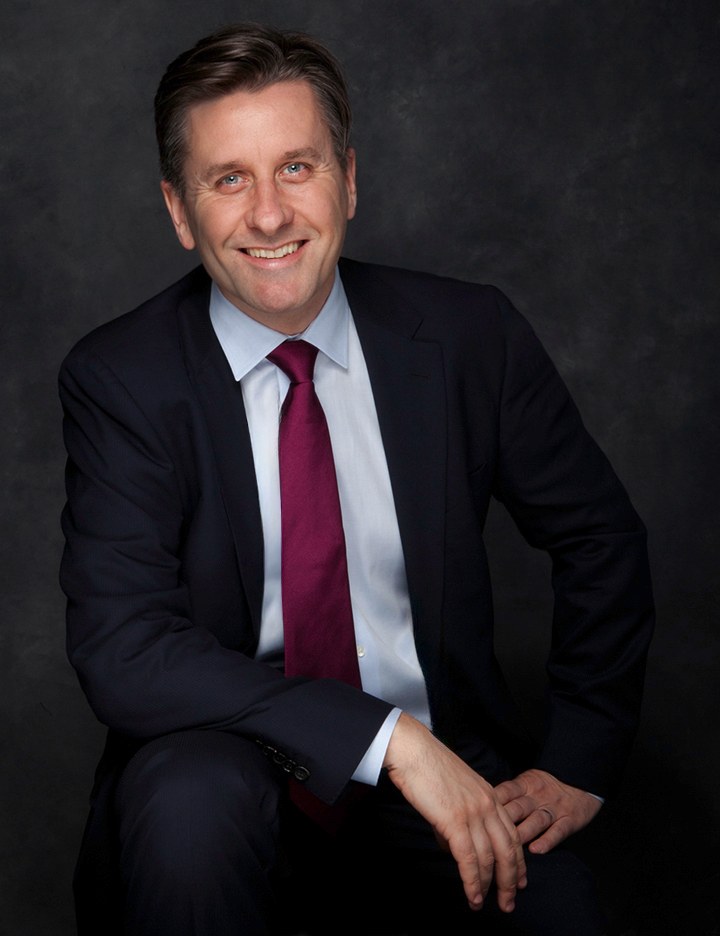
Man in a dark suit and red tie, seated and smiling, dark gray backdrop, photographed by Annie Watson in her Naples studio
The Short Answer

Posing softens the appearance of a double chin by changing three things: the height of the camera, the distance the skin under your jaw has to cover, and the angle that area is seen from. Raise the lens to slightly above eye level, push your forehead toward the camera and bring your chin down a fraction, turn your body away, bring your face back, and let your shoulders drop.

None of that changes your face. It changes what the lens is looking at and how it is lit, which is the honest version of posing flattering in camera. It is geometry, it works in the frame rather than on you, and it is not a promise about a particular face.

What the camera is actually doing.

The area between the chin and the throat is soft tissue over no bone. In life it is seen in motion, from wherever the person you are talking to happens to be standing. In a photograph it is flattened into two dimensions, held still, seen from one fixed height and lit from one direction, so the camera draws one continuous shape unless something creates an edge.

Then three things typically make it worse, and all three are outside your face:

  • A lens below eye level, pointing up into the whole underside of the jaw. This is the single largest cause, and it is why phone photographs are so much worse than any other kind.
  • A lens too close, magnifying whatever is nearest and stretching the lower face forward.
  • Flat light from the camera's own direction, filling the shadow that would separate jaw from neck.

So a great deal of what reads as a fact about a face is really a fact about a phone held at chest height, eighteen inches away, under a light directly overhead. Change those three and much of it changes with them. The rest of this page is what your body can do once they have.

Fix one: get the lens up.

First, because it outranks everything else. No posing rescues a photograph taken from below.

Slightly above eye level is the target. From there the lens is looking along the top of the jaw instead of up into the space beneath it, which is the whole area in question. An inch or two above your eye line is enough; far higher distorts the head instead.

In practice this means asking, because nobody volunteers it. Ask whoever is holding the phone to lift it to their own eye line or above, and to step back rather than lean in. On your own, get the phone onto a shelf or a stack of books at the right height. A propped camera at eye level beats a hand held phone at chest height every time, however well you pose in the second one.

The full logic of camera height, distance and the turn is set out in the guide to angles that flatter, if you want to know why this one variable carries so much.

Fix two: forward, then down.

Now the body. Push your forehead toward the camera so the head travels forward on the neck, then lower the chin a fraction. Forward, then down. Never up.

It works by geometry rather than by anything happening to you: the skin between jaw and throat has a longer path to cover, so the slack goes out of it, and the tilt takes the underside out of the lens's view. Together they do more than any other adjustment available to you.

The instinct runs the other way. Told to fix this area almost everyone lifts, which aims the soft underside straight at the camera and adds the nostrils, and if you have ever tried to help yourself in a photograph and made it worse, that is what happened.

The margin is small and personal, and it shifts with camera height and with whatever is around your neck. Finding your own amount, and releasing the jaw tension that undoes it, is the whole subject of jawline and chin posing. Learn it there and come back here for the rest of the stack.

Fix three: the turn, and the long side.

Straight on is the hardest presentation of this area: the camera sees the full width of jaw and neck at once, with nothing to break it up.

Turn your body away, let your weight settle onto the rear foot, and rotate your face back to the lens. As the head rotates, the near jaw is seen along its length rather than across its width, which reads as a line rather than a mass. Even a modest turn changes it noticeably.

Two refinements make the turn work harder. Drop the near shoulder slightly, because a raised one shortens the neck. And grow tall through the top of your head rather than the chest, which recovers the neck length that slouching quietly removes.

Posture is doing more here than you would guess. Rounding forward drags the head backward on the neck and collapses the whole area, so two photographs a minute apart can look completely different. Stand tall first, then move forward and down from there rather than from a slump.

Fix four: the tongue, and other small levers.

A few small mechanical tricks stack on top of the big three. None replaces camera height, and together they are worth real ground.

  • The tongue. Press the flat of it against the roof of your mouth, just behind your top teeth, and hold while the frame is taken. It engages the floor of the mouth so the area under the chin reads firmer in the frame, and nobody can see you doing it.
  • Breathe out first. An exhale drops the shoulders, lengthens the neck and gives the forward and down move more room.
  • Do not clench. A gripped jaw sets the mouth into a line, so a correct position can still photograph as braced. Let the back teeth come apart a few millimeters.
  • Give your hands something to do: a hand clamped against a hip tips that shoulder up and shortens the neck.

Try them one at a time. Six simultaneous adjustments make you look exactly as busy as that sounds, which is the real limit of any checklist; the wider version of that sits in the guide to how to pose at a first photoshoot, where nerves and being directed are the subject.

What you wear, and where the light falls.

The first is what is on your neck. A high collar buttoned to the top sits exactly where the jaw line needs space. An open neckline gives the eye a longer vertical run and lets the jaw read against skin rather than fabric. A heavy scarf adds bulk in the one place you would rather it did not. That subject is worked out in necklines that flatter in headshots.

The second is light. Flat light from the camera's own direction fills every shadow, including the one that separates jaw from neck. Light from slightly to one side and above puts a shadow under the jawbone, and that shadow draws the edge. You cannot carry good light around, but you can move: turn so the source sits off to one side and above rather than behind the camera.

Hair is the quiet third factor. Hair falling forward along the jaw shortens the visible line; hair pushed back or worn up lengthens the neck. Neither is better. It is worth knowing which one you have brought.

The honest limit of all this.

Posing is geometry. It changes the angle, the distance and the tension in a piece of tissue, and so changes what a lens records. It removes nothing and it is not a promise about your particular face. Anyone telling you a pose will make part of you disappear is overselling a genuinely useful tool.

Second: this is not a flaw and you are not the exception. It is soft tissue where everybody has soft tissue, rendered flat by a device that sees one angle. If a photograph has made you feel it is the first thing anyone notices about you, that is the photograph talking.

Third: retouching is a separate question, and it should be. Images are retouched by hand, and what that does and does not mean is set out in the guide to retouching. Posing happens in camera before any of it.

And if what actually brought you here is that you have been putting off a picture you need, that is a different problem, answered in the guide to camera anxiety and what a directed session does about it.

Putting the stack in order.

The whole stack in order, strongest first.

  • Get the lens to eye level or above, and further away than feels necessary.
  • Stand or sit tall, then let your shoulders drop on an exhale.
  • Turn your body away from the camera and bring your face back toward it.
  • Push your forehead forward, then lower your chin a fraction.
  • Drop the near shoulder, keep daylight at the elbow, unclench the jaw.
  • Add the tongue against the roof of the mouth for the frame itself.
  • Reset between frames, because a held position collects tension in exactly this area.

In a session none of that is yours to run. The camera height is set for the crop, the light is placed so the shadow under the jaw does its job, and the position is rebuilt every time you change looks, sit down or turn. The rest of the mechanics across the whole body are in how to pose for photos, and it is why a professional headshot made this way looks like you on a good day rather than a picture you hope nobody enlarges.

Key Takeaways
  • Most of what people read as a double chin in photographs is caused by a low, close lens and flat light, not by the face in front of it.
  • Raise the camera to slightly above eye level and step it further back; that single change outranks every pose you could adopt.
  • Push the forehead forward and bring the chin down a fraction, because lifting the chin aims the whole underside of the jaw at the lens.
  • Turn your body away and bring your face back, so the jaw is seen along its length rather than across its width.
  • Grow tall and drop the shoulders first, then set the chin, because a raised shoulder shortens the neck and undoes the move.
  • An open neckline and light from slightly above and to one side give the jaw line room and a shadow to read against.
  • Posing changes what the lens records; it does not remove anything, and it is geometry rather than a promise about your face.
Next Step

Bring the collar, I will bring the angle.

Camera height, the turn, the forward and down, the shadow under the jaw: that stack is set frame by frame from behind the lens, and it gets rebuilt every time you change a look. If you have been avoiding a picture you actually need because of this one thing, call (239) 319-6171 or send the form and say so plainly; it simply becomes part of the plan.

Book a Session Call (239) 319-6171
Put It to Work

Sessions this guide points to.

Good to Know

Questions, answered.

Does the chin forward move work for everyone?
The mechanic is the same for every face; the amount is not. A longer neck has more room to travel, a shorter one gets most of its benefit from the forward push with barely any tilt, and camera height or a buttoned collar changes it again. Because the right amount is personal rather than a number you can copy, the step by step way to find your own is set out on the jawline and chin posing page.
Why does it look fine in the mirror and not in the picture?
Because you look at a mirror from your own eye height and a camera is usually lower. A mirror also lets you settle your head into whatever looks best from exactly where you are standing, which is a spot nobody will ever photograph you from. To make a mirror useful here, keep your eyes level rather than tilting your head, and check the same position from slightly below to see what a low lens would do.
Is the tongue trick real, or is it just an internet thing?
Real, and smaller than it is made out to be. Pressing the flat of your tongue to the roof of your mouth engages the floor of the mouth, so the area under the chin reads firmer. That is the whole effect. It will not rescue a picture taken from below with the chin lifted. Add it last, once the camera height, the turn and the forward-and-down are already in place.
What should I wear if this is my main worry?
Something open at the neck: a v shape, a scoop, or a collar left unbuttoned. Avoid a tight high collar, a heavy scarf or a bulky knit right under the jaw. Darker tones through the shoulders keep attention on the face. Bring options rather than deciding alone, since we plan the looks together before the day.
Is it worse in a group photo, and can I do anything?
Group frames are harder, because you control neither the camera height nor your position and someone is usually shooting from below and close. Do what you can: stand rather than sit, take a spot toward the middle where the lens is less angled, turn slightly rather than facing square on, and do the forward and down move as the count starts. Then let it go.
Do I need to hold my head forward the whole time?
No, and trying to would give you a tense neck and a set expression. Take the position for the frame and release it between frames: hold, breathe out, let the picture happen, then drop everything and rebuild. That rhythm is better for your face too, because an expression held for thirty seconds looks held however good the geometry underneath it is.
Book Your Session

Your best headshot is one session away.

Tell me a little about what you have in mind and I will be in touch personally. Pricing is personal, so the best way to plan is a quick call.

Studio
5400 Yahl St, Naples FL

Prefer to talk? Call (239) 319-6171. I respond personally.