Portfolio
Headshots Boudoir Personal Brand
More
Guides Investment Guided Posing About Book a Session
Home  /  Guides  /  Posing for Tall Frames
Posing

Posing for tall frames without the stoop.

If you are tall, there is a good chance you carry one habit into every photo without knowing it: a slight forward curl of the shoulders and neck, worn in by doorways and group photos and a lifetime of conversations held at a lower height than your own. It reads on camera before anything else does. The fix is not to stand taller. It is a specific bend, at a specific joint, aimed at the lens instead of away from it.

By Annie Watson · Naples, Florida · Updated September 2026
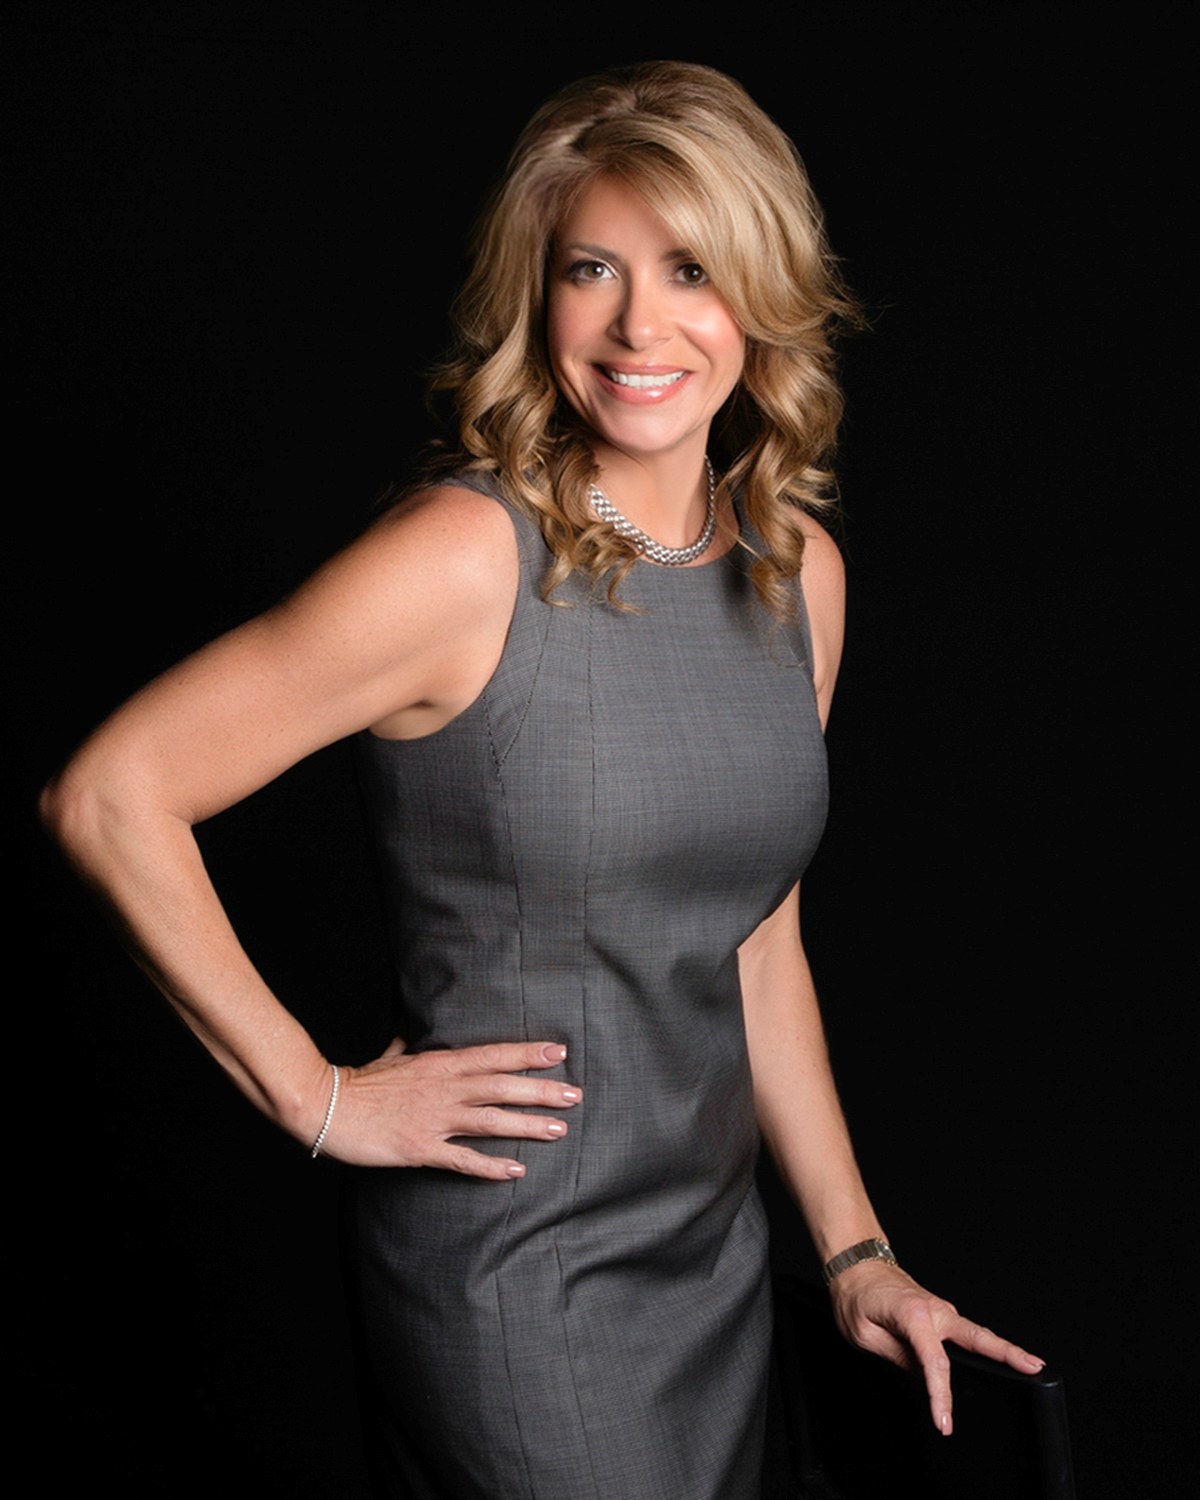
Woman with blonde hair in a gray sleeveless dress, hand on hip, dark backdrop, photographed by Annie Watson in her Naples studio
The Short Answer

Height is not the problem in a tall person's photo. The learned stoop is. The fix is a hinge at the hip, not the neck: keep the spine long, lean the whole upper body forward from the hip joint, and let the chin follow with a small forward and down tilt. Raise the camera to meet the eye line rather than shooting up from below, which exaggerates height in the least flattering way and forces the chin up.

Everything else, seated frames, arm placement, standing beside a shorter person, follows from that one hinge. Get the hip bend right and the rest of the frame settles around it.

The stoop is a habit, not a body type.

Anyone who is used to being the tallest person in most rooms has usually learned, without ever deciding to, to fold a little at the neck and shoulders when talking to people or standing in a group photo. It becomes automatic long before a camera is involved. On camera it reads as apologetic, and it also does the exact opposite of what someone might expect: rounded shoulders and a dropped head make a tall frame look narrower and less grounded, not shorter.

The fix is not to fight the stoop by throwing the shoulders back and the chest up, which reads as stiff and overcorrected. It is to move the hinge down from the neck to the hip, which is the subject of the next section and the single most useful adjustment in this guide.

Hinge at the hip, not the neck.

Stand with feet staggered, weight on the back foot, spine long from the tailbone to the crown of the head. Then, keeping that length, tip the whole upper body forward from the hip joint, a few degrees, the way you would lean in to hear someone at a loud table. The neck and shoulders stay exactly where they were relative to the spine. Nothing folds. The lean brings the face closer to the lens and gives the frame a forward energy instead of a retreating one.

This is the same forward lean I teach in how to pose for every client, and it matters more here because a tall frame has more spine to keep straight while leaning it. Practice it slowly in a mirror: hinge forward until you feel the lean in the front of your hips, not a curve in your lower back. If your lower back rounds, you have bent the wrong joint.

Camera height meets you, not the other way around.

A lens shooting up from below a tall subject's eye line is the least flattering angle available to anyone, and it is a mistake people make specifically because they assume a tall person needs to be shot from further back and lower to fit in frame. The opposite is true. The camera should still sit at or slightly above eye level, the same rule as for every client, which usually means raising the camera rather than backing away and tilting up.

Backing the camera further away to fit a tall body in frame, rather than raising the lens, is the more common error and the easier one to fix. Distance and height are two separate adjustments, and only one of them protects the angle on the face.

Arms give a tall frame somewhere to go.

A tall body has more length to fill with a pose, and arms held flat against the sides read as even longer and narrower than they would on a shorter frame, closing off exactly the space that could be doing work. Give the arms a bend: a hand in a pocket with the elbow angled slightly out, a hand resting on the opposite forearm, an elbow that creates visible daylight between the arm and the ribs. The full mechanics of where hands and elbows go in a standing pose are in my guide on how to pose your arms, and they apply here with slightly more emphasis on using the extra length rather than hiding it.

A bent arm also breaks up a long vertical line in a useful way, adding a diagonal the eye can follow instead of one unbroken column from shoulder to hip.

Sitting changes the whole equation.

Sitting removes most of a tall frame's visible length in one move, and it also removes the biggest reason for the stoop, since there is no longer a room full of shorter people to lean down toward. The hip hinge still applies, seated exactly as it does standing, and the rest of the seated method, where the knees and forearms go and how far forward to sit, is in my seated posing guide. For a tall frame it can be the more comfortable option, because there is less body to direct at once.

A seated portrait also crops closer by default, which sidesteps almost every concern in this guide about full-length proportion and puts the attention back on the face, where a directed session spends most of its energy anyway.

Standing beside a shorter partner.

In any group photo, a large height gap pulls the eye toward the difference instead of toward either face, and the instinct to close the gap by slouching creates the exact stoop this guide is trying to remove. If you are ever in a frame with a much shorter person and nobody is directing it, the fix is placement, not posture: stand a half step behind rather than shoulder to shoulder, angle both bodies slightly instead of facing the lens square, and keep your own hinge at the hip. Let the composition absorb the difference so your spine does not have to.

For a matched set of headshots across a team, the question mostly disappears, because team members come to the studio and are photographed one at a time, in sequence, under the same light and the same direction. The camera height resets for each person, so the tallest person on a team is framed exactly as well as the shortest, and the portraits still sit together on the page. The same holds for a personal brand library: the frame is built around you, not around whoever you usually stand next to.

The natural read comes from all of it together.

A tall frame that hinges at the hip instead of the neck, sits under a camera at the right height, and gives its arms somewhere to go stops reading as apologetic and starts reading as simply present. That combination is also what separates a photo that looks directed from one that looks caught, which is the exact difference my guides on how to pose for photos and how to look natural in photos both work through in more depth.

None of it depends on remembering all of it at once. In a session I call out one adjustment at a time, in an order that builds, the same way I would for anyone. If the hinge and the shoulder position still feel unfamiliar on their own, the underlying spine and shoulder mechanics are laid out in more depth in my guide to posture in portraits. Height changes which adjustments matter most. It does not change the method.

Key Takeaways
  • The stoop a tall frame tends to carry into a photo is a habit, not a fact about the body, and direction can take it out of a frame.
  • The fix is a hinge at the hip that keeps the spine long, not a fold at the neck that rounds the shoulders forward.
  • The camera should rise to meet eye level rather than shoot upward from a lower, farther-back position.
  • Arms need a bent, purposeful placement to use a tall frame's extra length instead of closing it off, covered fully in how to pose your arms.
  • Sitting removes most of the height question and often feels more natural, and the method is in the seated posing guide.
  • In a group photo, placement solves a height gap and slouching only recreates the stoop. In a studio team set, each person is photographed on their own, so the gap never enters the frame.
  • Good posture on its own does not look natural. Reading as present rather than posed is what my guide on how to look natural in photos is about.
Next Step

One hinge, directed the whole time.

The hip hinge is worth a few slow tries in a mirror before you come in, so the feeling is familiar when I ask for it. Everything else in this guide, the camera rising to your eye line, the arms, the crop, is mine to set. If you are tall and every photo of you has a stoop in it, call (239) 319-6171 or send the form and say so. It is a short conversation.

Book a Session Call (239) 319-6171
Put It to Work

Sessions this guide points to.

Good to Know

Questions, answered.

Why do I always look stiff in photos when I try to stand up straight?
Standing up straight by pulling the shoulders back and the chest up overcorrects the stoop instead of fixing it, and overcorrection reads as rigid on camera. The better move is the hip hinge from this guide: keep the spine long and lean the whole upper body forward from the hips, which reads as present and engaged rather than braced.
Should I ask the photographer to back up so I fit in the frame?
No. Backing the camera away to fit a tall body in frame is a common instinct and it is the wrong fix, because it usually drops the lens below eye level at the same time. The right adjustment is raising the camera to meet eye level, not moving it further back. That is set before the first frame, not after you notice it.
Does a tall frame need a different crop than anyone else?
Not fundamentally. The same crop rules that apply to any headshots or full-length photo apply here. What changes is emphasis: arm placement and the hip hinge matter more for a tall frame because there is more length to direct, but the underlying rules of a good crop stay the same.
I am the tallest person in every group photo I have ever been in. What is different about a directed session?
In an undirected group photo nobody is managing the height gap at all, so the tallest person usually compensates alone by slouching. In a directed session there is no gap to manage. You are photographed on your own, the camera rises to your eye line, and the hinge, the arms and the crop are built around your frame rather than around the people who happen to stand near you.
Why does pulling my shoulders back and my chin up not fix it?
Because it moves the correction to the wrong joint. Pulling the chin and shoulders up without addressing the hinge trades one kind of tension for another, and the camera reads both. Learn the hip lean from this guide, practice it slowly, and the neck and shoulders tend to settle into the right place on their own.
Book Your Session

Your best headshot is one session away.

Tell me a little about what you have in mind and I will be in touch personally. Pricing is personal, so the best way to plan is a quick call.

Studio
5400 Yahl St, Naples FL

Prefer to talk? Call (239) 319-6171. I respond personally.