Portfolio
Headshots Boudoir Personal Brand
More
Guides Investment Guided Posing About Book a Session
Home  /  Guides  /  Hair Styling for Headshots
Wardrobe

Hair styling for a headshot.

Hair is the frame around your face, and a headshot crop puts most of it right at the edge of the picture. This guide covers what actually survives a crop and studio light: volume, part, flyaways, the second look, and what to do about humidity, without touching a single product name.

By Annie Watson · Naples, Florida · Updated September 2026
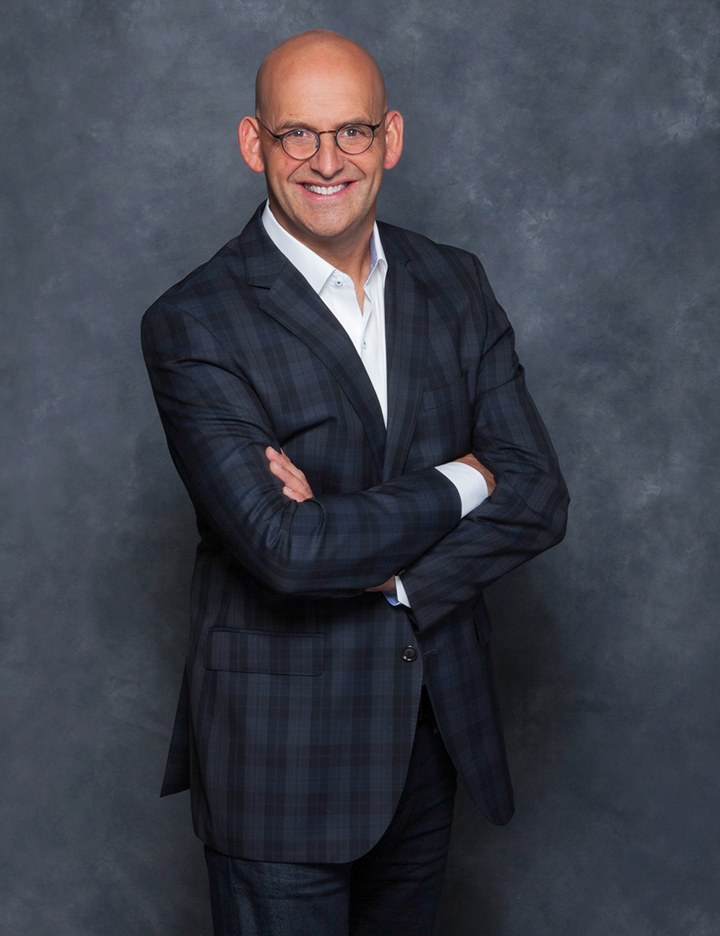
Man with a shaved head and glasses in a plaid jacket, arms crossed, dark gray backdrop, photographed by Annie Watson in her Naples studio
The Short Answer

Hair for a headshot should have some lift at the crown, sit close enough to your head that stray strands do not read as clutter, and be styled the way you actually wear it on a good day rather than a special-occasion version of yourself. Studio light is bright and close, so it finds flyaways and flat sides that daylight forgives.

The safest plan is to style at home the way you normally would, then check it once more under bright light before you leave the house, and give it a quick comb once you arrive.

Why flat sides show and volume reads.

A headshot light is close, bright and usually set slightly above eye level, which is exactly the setup that flattens hair pressed to the head and lifts hair with some shape to it. Flat sides lose their edge against a plain background and can make a face look narrower or heavier than it is. A little lift at the crown does the opposite: it gives your head a clean silhouette and keeps the top of the frame from feeling empty.

This is not a case for big volume. It is a case for honest volume, the amount your hair naturally holds when it is clean and finished, not flattened by a hat, a pillow or a long drive. If your hair sits flat by early afternoon, say so when we plan the session, and bring a comb for the moment before we start.

The same logic runs the other way for very full or curly hair. The studio light will not shrink volume down, so if you want a more contained look for a formal headshot, pull it back or pin it the way you would for a day you wanted to look sharp, and save the fuller version for a personal brand frame where a softer, more relaxed look works in your favor.

The part and your face shape.

Your part decides how the light falls across your forehead, and it is worth checking in a mirror under a strong lamp before the day rather than discovering it in a photograph. A part that has drifted over time, or one you only use because it is fastest in the morning, is not automatically your most flattering option.

  • A side part that sits a little off-center opens the face and tends to be the most forgiving option for most people.
  • A center part reads as clean and confident, and it suits symmetrical, oval and longer faces especially well.
  • If your hairline has a natural cowlick or an uneven start, work with it rather than fighting it: a part just off from where it wants to sit lies flatter than one forced against it.
  • For very short hair, the same idea applies to how product is worked in: pushed the direction it naturally falls, not against the grain.

None of this needs to be perfect. I am watching your part and your flyaways through the lens the whole time we shoot, and a quick comb between frames is a completely normal part of a sitting. What matters is arriving with a part you have actually tested under bright light, not one you are guessing about.

Flyaways, humidity and studio light.

Studio light is unkind to the strands your daily mirror never catches. A single flyaway near the crown can catch the light and glow, and against a plain backdrop it reads far larger than it actually is. This is simply a fact of how a bright, close light behaves, not a comment on how you did your hair.

On a humid day, moisture in the air works against a smooth finish faster than most people expect, and the drive in is where it does its damage, not the studio. The drive itself, and what to carry for it, is covered in the guide on what to wear for a summer photoshoot in Florida. The part that belongs here is what happens once you are inside: do any final smoothing once you are settled, and expect to touch it up again between looks if your session includes more than one.

The quick fix during a sitting

A damp finger, a small comb, or simply smoothing a strand with a hand between frames solves almost everything that comes up on the day. I will tell you exactly what I am seeing through the lens, because a flyaway that is invisible to you standing under studio light is often obvious in the frame, and it is a thirty second fix once someone points at it.

The second look: changing hair mid-session.

If your session includes more than one outfit, it is worth deciding in advance whether your hair changes with it. A full re-style between looks is rarely practical, but small adjustments are, and they are often what separates two looks that feel genuinely different from two that feel like one look photographed twice.

  • Half up for a formal look, then down and looser for a relaxed one, is the fastest real change most people can make themselves.
  • A part switched from center to side shifts the whole read of a face without touching length or color.
  • Pulling hair fully back for one frame and letting it frame the face for another creates two distinct silhouettes from one style.
  • Bring the pins, clips or a small brush that would let you make that change quickly. I keep the pace unhurried, but the change itself is on you.

Decide this before the day rather than mid-sitting. A plan you settled on at home, even a simple one, executes faster and looks more intentional than an improvised change in front of the camera.

What men can do in five minutes.

Men's hair for a headshot is mostly about two things: a clean line at the hairline and neck, and enough hold that the style survives the drive over. When to book that trim is its own question, answered in haircut and color timing before headshots; this page assumes the cut is already done.

A small amount of product worked through with fingers, not a comb, tends to look the most natural under studio light, because a comb can leave visible lines that a bright light exaggerates. A beard or stubble wants the same treatment as the hair on your head: tidy the edges at the cheek and the neck, and leave the shape alone. A beard groomed into a different shape for one photo tends to look like exactly that in the final image.

If your hair is thinning, the honest advice is the same as for anyone else: style it the way you wear it with confidence on an ordinary day. A headshot photographs the person people are going to meet, and an unfamiliar attempt at more coverage usually reads less naturally than the version you already know works for you.

Where a stylist fits in, and where it does not.

You do not need a stylist for a headshot. Hair you did yourself, the way you always do it, is very often exactly right. If you would rather have that part handled, I work with several professional stylists who can be arranged for hair and makeup before the shoot, for an added fee, which takes the morning-of guesswork out of it entirely.

The decision usually comes down to how confident you feel doing your own hair under pressure and how important the occasion is. A headshot that will sit on a company site for a long time is a reasonable place to ask for the help. A quick personal brand refresh you already know how to style yourself is often fine without it.

Whichever way you go, the goal is the same: hair that looks like you on a day you felt good, not a version of yourself built for a different occasion entirely. If you are arranging a stylist, it is worth planning makeup at the same time, and the specifics of what actually holds up under studio light are their own subject in makeup that photographs well. What a session includes beyond this, from posing to the wardrobe consultation, is on the headshots page.

How this changes for LinkedIn and brand work.

A tight headshot crop treats hair as a frame around your face, so precision at the hairline and part matters more than it would in a wider shot. Squeezed further into a small circle, as it is for LinkedIn headshots, flyaways and stray strands near the edge become even more visible relative to the size of the whole image, simply because there is less of the picture for them to hide in.

Personal brand and lifestyle frames are more forgiving. A wider shot, a softer pace, or hair caught mid-movement can look natural and alive in a way that would feel busy in a tight formal crop. If your session covers both, plan the tighter, more controlled hair for the formal frames first and let it relax for the wider, warmer ones later in the sitting.

Whatever the crop, the wardrobe and the hair are working together, not separately. The full decision on clothes, from color to layering, is covered in what to wear for headshots, and the two are worth planning at the same time. Necklines matter more when hair is pulled back, since a neckline that would normally share attention with loose hair is suddenly carrying the whole lower half of the frame alone, which is covered fully in necklines that flatter a headshot. Hair sits alongside a longer list of small wardrobe details worth checking before a session, rounded up in wardrobe mistakes that quietly ruin headshots.
Key Takeaways
  • Studio light rewards a little lift at the crown and punishes flat sides, so style the way your hair actually holds shape on a good day.
  • Test your part under bright light before the sitting. A part you only use out of habit is not automatically your most flattering one.
  • Flyaways and humidity show up more in studio light than daylight, and a quick comb between frames is a normal part of the process.
  • Plan any mid-session hair change in advance: half up to down, or a switched part, works better than an improvised re-style.
  • Men do best with a light amount of product worked in by hand and facial hair trimmed the way it is kept every day.
  • Stylists can be arranged for hair and makeup before the shoot, for an added fee, if you would rather not manage it yourself.
  • A tight LinkedIn crop is the least forgiving format for flyaways, while wider brand frames tolerate more natural movement.
Next Step

Say which way you want the hair handled.

Whether you style your own hair or have a stylist arranged before the shoot, say so on the call and we will plan the rest, from part to pace, around that answer. Call (239) 319-6171 or send the form and I will reply myself.

Book a Session Call (239) 319-6171
Put It to Work

Sessions this guide points to.

Good to Know

Questions, answered.

Should I get a haircut right before my session?
Not the day before. Fresh cuts can look slightly stiff or uneven at the edges until they settle, and the exact window that works best is its own subject in haircut and color timing. As a general rule, aim for a cut with a little breathing room before the camera, not one you just walked out of.
Can I bring my own hairspray or product to the session?
Yes, and it is a good idea if you have a product that reliably controls your hair. Bring whatever you already use at home rather than trying something new for the occasion, since an unfamiliar product can behave differently than you expect under studio light and under pressure.
What if my hair does not hold curl or volume by the afternoon?
Mention it when we plan the session. Plan a quick touch-up right before we start rather than relying on styling from earlier in the day to have survived, and bring the comb or pins that make that touch-up possible. It is a normal thing to plan around, not a complication.
I am going gray. Does that change anything for a headshot?
No. Gray hair photographs the same as any other color: what matters is volume, a clean part and control of flyaways, not the color itself. Styling it the way you wear it with confidence is the right approach, the same advice that applies to everyone.
Will you tell me during the session if something looks off?
Yes, every time. I am watching your hair through the lens the whole sitting, and a flyaway or a shifted part gets mentioned the moment it shows up, well before it ends up in a frame you would have to fix later. Guided posing covers hair just as much as chin and shoulders.
Should I straighten my hair if I usually wear it curly?
Only if straight is genuinely how you wear it. Curl photographs well under studio light when it has a defined shape rather than a half-set one, and a smoothed version of naturally curly hair often starts to look like a costume by the second frame. If you want both, make the smoother version your second look, worked out at home rather than improvised.
Book Your Session

Your best headshot is one session away.

Tell me a little about what you have in mind and I will be in touch personally. Pricing is personal, so the best way to plan is a quick call.

Studio
5400 Yahl St, Naples FL

Prefer to talk? Call (239) 319-6171. I respond personally.