Portfolio
Headshots Boudoir Personal Brand
More
Guides Investment Guided Posing About Book a Session
Home  /  Guides  /  Makeup That Photographs Well
Wardrobe

Makeup that photographs well.

Makeup for a camera is not more makeup. It is the same makeup, applied with a few different priorities: matte where you would normally leave sheen, defined where you would normally leave soft, and blended further than daily life ever requires. This is the technical version, layer by layer, in the order you put it on.

By Annie Watson · Naples, Florida · Updated September 2026
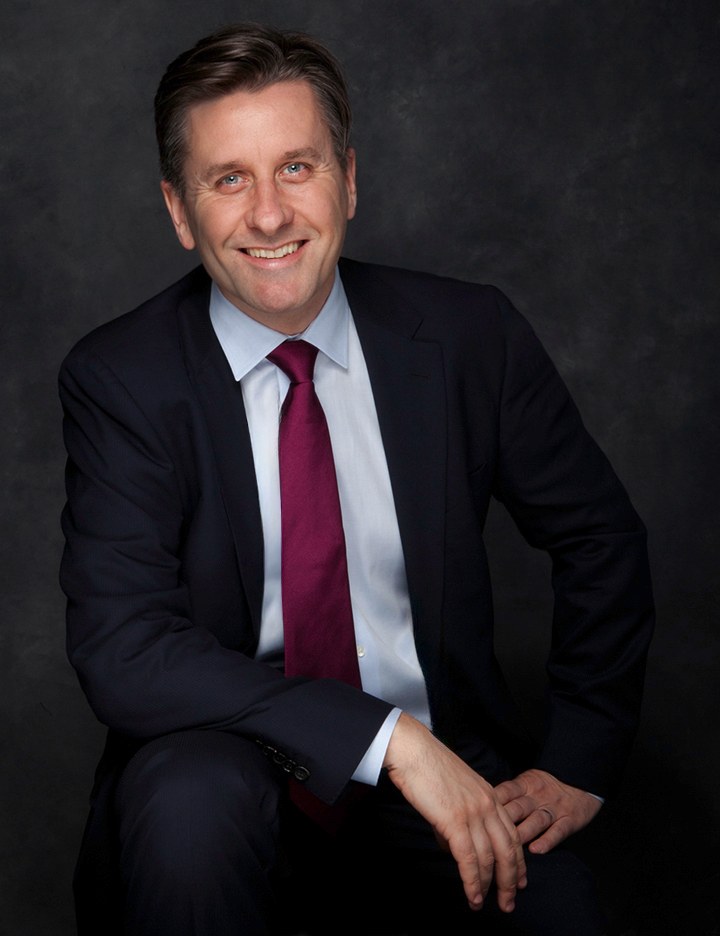
Man in a dark suit and red tie, seated and smiling, dark gray backdrop, photographed by Annie Watson in her Naples studio
The Short Answer

Makeup photographs well when the base is matte and carries no sunscreen in it, the brows and lashes are defined, the lip has a visible edge, and every line is blended past the jaw and hairline. Studio light softens everything it touches, so a face done exactly as you would for a normal day often reads as slightly washed out in the frame.

Go one step stronger than daily, not three. Skip shimmer and heavy highlighter, keep powder on the T-zone, and bring your own lipstick and blotting papers for touch-ups between looks.

The one adjustment for the light.

Everything below comes from one fact about studio light: it is soft and even, and soft even light flattens contrast. The shadows that give your face structure in a hallway mirror get filled in, which is flattering and which also means the definition you rely on daily partly disappears.

So the general instruction is not more product. It is one step stronger than you would wear to something that matters, applied to the features that carry structure: brows, lashes, lip edge and a little shape along the cheek. Everything else stays where it is.

The other half is texture. Anything shiny returns a bright spot straight to the lens. Matte finishes read as skin, while glossy and shimmering finishes read as light, which is why a face that looks luminous in person can photograph as damp.

If you do not wear makeup at all, none of this is compulsory. A tidy brow, a lip balm with a little color and a light matte powder on the forehead and nose carry a portrait perfectly well, and I would rather photograph you looking like yourself than looking corrected.

A base that stays matte.

Base is where photographs are won and lost, and it comes down to finish and match.

Finish first. Choose a matte or a natural finish rather than anything described as dewy, luminous, glowing or radiant. Those finishes are built to reflect, and under studio light they reflect enthusiastically across the forehead, the nose and the tops of the cheeks. Set the T-zone with a light translucent powder, applied with a brush rather than pressed in, so the shine is controlled without the skin looking powdery.

The sunscreen problem

Sunscreen in a foundation, a primer or a moisturizer can cause flashback: the ingredients that block light for your skin also bounce a camera's light straight back, and the face then reads paler or ashy than the neck below it. It does not always happen and it cannot be predicted from a label, so the safe habit is to keep sunscreen off your face on the day of a portrait. Protect your skin as you normally would the rest of the time, and ask your dermatologist about anything you are unsure of.

Match second. Test the shade along the jaw in daylight, not on the back of your hand, and check that the color continues onto your neck. A base that stops at the jawline is one of the few makeup problems a camera makes worse rather than better, because the crop puts the boundary in the middle of the frame.

Blend down onto the neck and out to the hairline, then check yourself in daylight by a window rather than under a bathroom bulb.
Brows, eyes and keeping definition.

The eyes are where the camera looks, and they are also the first thing soft light quietly erases.

  • Brows: define the shape and fill the sparse parts, but keep the product one shade lighter than you think. A hard drawn line photographs as a hard drawn line, and there is no soft focus in a portrait.
  • Liner: a thin line close to the lash base opens the eye. A thick line, particularly all the way around, closes it and makes the eye look smaller in the frame.
  • Lashes: mascara on top and a light touch underneath. Curled lashes read better than long ones, because the camera sees the shape of the eye, not the length of the lash.
  • Shadow: matte tones do the work. Shimmer on the lid catches the light and can read as an oily lid rather than a glamorous one.
  • Under eyes: use less concealer than you want to. A thick layer creases in every frame and settles into fine lines under even light. A thin, well blended layer plus a whisper of powder is the version that holds.

If you wear glasses, keep the eye makeup simpler rather than heavier, since lenses add a layer between the camera and your eyes and busy shadow gets lost behind them anyway. Anything you plan for the brows, waxing, threading or tinting, usually wants a few days of margin so the skin has settled, and any timing question there is worth asking whoever does them.

One caution about anything new. A portrait is not the occasion to try an unfamiliar product on your face, because skin can react and the reaction always lands on the day.

A lip with an edge.

The lip is the single fastest improvement most people can make to how they photograph, and the reason is edges.

Soft light blurs the boundary between lip and skin, so a lip that reads as defined in your mirror can read as vague in a photograph, which takes definition out of the lower half of the face. A pencil in your own lip color, traced along the natural edge and softened inward, fixes it in about a minute. You are not drawing a new mouth. You are restoring the line the light removed.

Then choose a color you would actually wear. A satin or soft matte close to your own shade, or one step deeper, photographs beautifully. High gloss is the finish to avoid: it catches a bright reflection in the center of the lip, and hair sticks to it the moment you turn your head.

Very dark or very bright lipstick is a stylistic choice rather than a mistake, and it changes the register of the picture. For a business portrait it can pull attention from your eyes. For a warmer, more editorial frame it can be exactly right.

Bring the tube. Lipstick is the first thing to go during a sitting and the easiest to put back.

Cheeks, shine and the shimmer problem.

Cheek color puts life back into skin that even light has flattened. Without it, a face can read as tired even when everything else is right.

Apply less than you would for a room where people see you from across it, and blend upward and outward until there is no visible boundary. Cream or powder both work, as long as the color reads as circulation rather than as a stripe.

Highlighter is the product that most often surprises people. On the cheekbone it looks luminous in person and can photograph as a wet patch, because the studio light is already doing the job the highlighter was invented to fake. Skip it, or use a trace high on the cheekbone and nowhere else. The same goes for shimmering bronzer and any lotion with sparkle on the shoulders and chest.

Shine control is the running task. Oily and combination skin will come back through a base as the sitting goes on, and forehead and nose are always first. Blotting papers pressed on before powder, rather than more powder on top, keep the skin looking like skin. That whole subject, including what to do the days beforehand, belongs to the skincare timeline before photos.

One frame by a window, before you leave.

Whether you do your own face or someone else does it, one check catches almost everything a mirror hides.

Do the makeup in the best natural light you have rather than under a bathroom fixture, then take a plain phone photograph facing the daylight. Look at it at full size and zoom in along the jaw. An unblended jawline, flashback in the base, a lip that has lost its edge and shine on the forehead all show there, and each one takes a minute to fix at home and much longer to fix afterward.

If you would rather hand the whole thing off, I work with several professional stylists who can be arranged for hair and makeup before the shoot, for an added fee. Mention it when we plan your looks so it can be organized in advance. What every session covers, and what sits alongside it, is set out on the investment page. Whether to do your own or book someone, and how to brief a stylist who has not photographed you before, is the guide to professional makeup versus doing your own.

What to bring and what to say out loud.

A small kit prevents almost every makeup problem that comes up during a sitting.

  • Your lipstick and the pencil that goes with it.
  • Blotting papers, and the powder you used on your base.
  • A clean brush or sponge for touch-ups, plus cotton buds for a smudge under the eye.
  • A deeper lip, if a later look calls for one.

Then say your plan out loud when we talk. If you are keeping makeup minimal, I will light and pose to that, and if a look calls for something stronger, the makeup change happens between looks along with the wardrobe. How many looks you need is settled in the guide to outfit changes.

One last thing: retouching is done by hand, and it works with what the camera recorded. A well matched base and a blended jaw photograph better than the same face corrected afterward.

Makeup and wardrobe are one decision, not two, since a lip and a color story either agree or argue. Choosing the shades that suit you is the best colors guide, and the wider run of clothing questions sits in what to wear for a headshot. The register you choose is different again for business headshots than it is for a boudoir session, where a softer, warmer face suits the work.

Key Takeaways
  • Studio light flattens contrast, so go one step stronger than daily on brows, lashes and lip edge, and no further.
  • Choose a matte or natural base finish and keep sunscreen out of the products on your face that day, because flashback shows as an ashy, paler face.
  • Match the base along the jaw in daylight and blend onto the neck; the crop puts that boundary in the middle of the frame.
  • A lip pencil in your own color restores the edge that soft light blurs, and it is the quickest improvement available.
  • Skip highlighter, shimmer shadow and gloss, all of which return bright reflections the light was already providing.
  • Photograph yourself on a phone in daylight before you leave; it catches unblended lines a mirror hides.
  • Bring lipstick, powder and blotting papers, and say your plan on the call so the looks are planned together beforehand.
Next Step

Settle the face before the day.

Makeup decides how the light lands on your face, which is why it belongs in the planning and not in the car on the way over. Whether you do your own or want a stylist arranged, say so when you call (239) 319-6171 or send the form, and I will plan the light and the looks around that answer.

Book a Session Call (239) 319-6171
Put It to Work

Sessions this guide points to.

Good to Know

Questions, answered.

Should I wear more makeup than usual for photos?
One step stronger than you would wear to something that matters, applied to the features that hold structure: brows, lashes and the edge of the lip. Studio light is soft and fills in the shadows that normally give your face definition, so a completely everyday face can read as slightly washed out. Going three steps stronger is the opposite mistake, and it photographs as makeup rather than as you.
Why does my face look pale or grey in flash photos?
That is usually flashback from sunscreen in a foundation, primer or moisturizer. The ingredients that block light also bounce a camera's light, so the covered area reads paler or ashy while your neck stays the right color. Keep those products off your face on the day of a portrait, match your base along the jaw in daylight, and check the result in a phone photo before you leave the house.
Is highlighter really a problem?
In a studio, mostly yes. Highlighter exists to imitate light falling on a cheekbone, and in a portrait that light is already there, so the product adds a second reflection on top of a real one and can read as a damp patch. If you love it, use a trace high on the cheekbone and nowhere else, and skip shimmering bronzer and any lotion with sparkle on the shoulders and chest.
What if I do not wear makeup at all?
Then do not start on the day of a portrait. A groomed brow, a lip balm with a hint of color and a light matte powder across the forehead and nose is enough to keep shine down and definition up, and the picture will look like you. Retouching is done by hand, and the goal has never been a different face.
Can someone do my makeup before the session?
Yes. I work with several professional stylists who can be arranged for hair and makeup before the shoot, for an added fee. It is arranged in advance rather than on the day, so say so when we plan your looks, and bring your own lipstick anyway for touch-ups. Doing your own works just as well, so treat this as a preference rather than a requirement.
What about lipstick between different looks?
Changing the lip is the fastest way to change the register of a picture, and it costs almost nothing. A soft neutral for the formal frames and something deeper for the warmer ones gives you two clearly different sets from the same face. Bring both tubes and the pencil, and we make the change when the wardrobe changes.
Book Your Session

Your best headshot is one session away.

Tell me a little about what you have in mind and I will be in touch personally. Pricing is personal, so the best way to plan is a quick call.

Studio
5400 Yahl St, Naples FL

Prefer to talk? Call (239) 319-6171. I respond personally.